
Several of you have asked how I made Evyn's and Ashlyn's birthday linens, and I did promise a tut. So here you go! Dig into your stash or run to the fabric store to start putting your fabrics together. Don't make the same mistake I did; keep it simple – buy only three fabrics (one large scale, and two small) and as you're whipping this all up, be haphazard. It makes the project easier and the finished piece more charming.
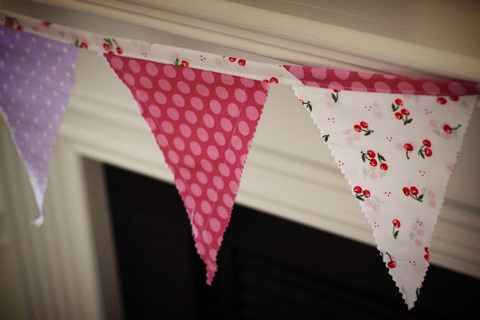
This post will cover the party bunting (or "flags") and the table linens. Bunting first – those are the most fun, anyway. One finished bunting is 9 feet long. I like to have three in my set.

Materials:
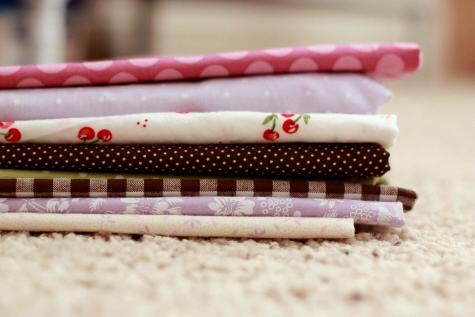
- Fat quarters of at least three coordinating fabrics (or leftovers from the table linens – see "Dressing the Table," below)
- Three yards bias tape, homemade or store bought
- Pinking shears or pinking rotary cutter
To Make:
1. Fold each fat quarter of fabric in half (wrong sides together) to measure 22 x 9". Starch and press.
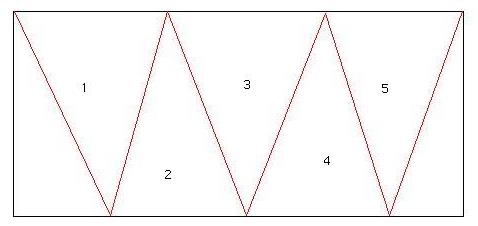
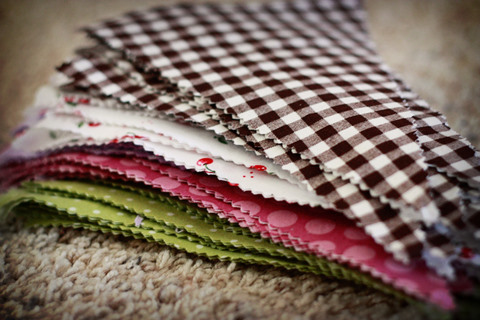
2. Cut five pairs of 6" x 9"-ish triangles out
of the folded fabric using pinking shears (see the handy diagram that someone else put together for me).

You
will have leftover scraps on the ends. Repeat cutting with other two
fabrics for a total of 15 (or so) triangle pairs. The starch should
keep each pair together. Remember: don't worry about precise measuring
and cutting of each triangle. Cut recklessly.

3. Leave
each pair of flags adhered together
and topstitch the two longest sides with a long stitch, using a 1/2" or
so inseam. Sew hastily and admire the whimsy of your uneven
stitching. Don't turn them inside out; that takes too long and the topstitching gives them
character.
4. Pin the finished flags between bias tape,
spacing them half an inch to an inch apart and leaving about six inches
of bias tape on either end for hanging.
5. Topstitch the bias tape closed, catching the flags as you go.
To Dress the Tables:
Rather than tell you how to sew (or fabric glue) a straight line on four sides, I'll just share the basic dimensions of the pieces I use when dressing tables for a party.
I like to have linens for at least two tables – one long and one square. In total I use two twin flat sheets (white tablecloths) and three different fabrics (1 table sash and 2 square toppers).
- I use two inexpensive twin white flat sheets (available at Walmart for about $3) for the basic tablecloth. I leave one alone and cut the other into a large square (finished dimensions are about 60" square).
- The longest table gets a fabric sash (table runner) – 18 x 90" is standard, but you can make it shorter. I buy a little over two yards of a particular fabric, cut it in half the long way and use one piece for the sash and the other piece for the party flags.
- The square table gets two square table toppers layered diagonally over each other – 45" square each. I buy two yards of each fabric and use the leftovers for the party bunting.
- Launder the linens immediately after the party and store them in a "birthday fabrics" tub for the next year. If you find that you wind up using different sized tables at future venues, just improvise with what you've got, turning the square pieces on the diagonal on long or round tables.
Very cute!!!
I love your idea and used it to make a birthday banner for my son. Check it at my blog. https://getinspired2.blogspot.com/2011/04/getting-ready-for-my-sons-4th-birthday.html
It’s funny how a simple directive can inspire such confidence: “cut recklessly.” Haha, I did! Now, instead of neatly folded fabric collecting dust, I’ve worked up the nerve and cut them all into triangles! Tomorrow will be pinning, then Thursday is a sewing day. I can’t wait to surprise my soon-to-be 5 year old with this lovely bunting at her tea party birthday party.
A question though…do you open the binding and sew one side to each flag, then fold over and topstitch, or just fold it over both sides of the flag, pin, and catch both sides of the binding in one shot?
Thanks so much for a great tutorial!!!
I just used this tutorial to make a rainbow birthday bunting for my daughter’s rainbow themed party. I posted a picture on my blog today. Just wanted to say thanks for doing the tutorial!
https://kindacrunchykate.wordpress.com/2011/02/01/tuesday-links-02-01-2011-the-birthday-edition/
This is the most awesome tutorial ever. I am totally late to the bunting party – I just made my first bunting tonight – in under an hour. Thanks for the permission to “cut recklessly”– I love it!!
This blog is wonderful, really nice!!! , i stay impressive with the whole information here. I really like know about everything because i usually like to answer very well when a person ask me something. I Think the most important thing is to know about several information, and you look smarter all the time.
Thank You for your helpful tutorial 🙂 I was able to make one for my daughters birthday tea party!! I ended up not sewing my individual flags but bought double sided iron on interfacing. You pop the iron on stuff in between the folded pieces of fabric, iron & then cut as usual. This eliminates using the starch and saves time on sewing. I only had to sew the flags into my binding at the end :)I used 4 different fabrics which made a 4 meter banner it only took me about 1hr 30 mins from start to finish to complete 🙂 Will definitely be making more of these!!
This really is an wonderful written write-up, Thanks for yet a different insightful post, as consistently!
Thank you for the tutorial and for making it easy. I’m making one of these for a baby shower this weekend and I hope to use it for Easter also.
Just found you in googling birthday banners – and I love it! So far we’ve got a purple one underway, with three others in the making. Everyone is getting a special banner this year … an 80th great grandma, a 90th birthday, and even my 7yo. Thanks for making putting it together so simple!