The evidence:
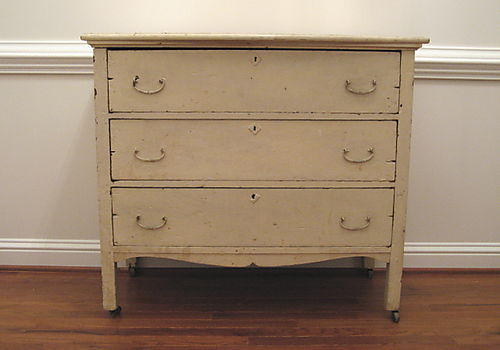
Before
Don’t let the shabby-chic charm of this piece fool you. In real life it was crusty, stained, and icky grody. And globbed with too many layers of paint. And it didn’t stand out on my practically-white wall (don’t get me started on the paint the builders picked for this house).
After
Yes, it needs a few more tchatchkes with color and height to dress it up, but now this is the perfect piece on which to perch them (hm, maybe a trip to the flea market is in order. Or Homegoods.):

It still has charm with nicks and dings and some of the woodworking details still visible. And I love those antique roller-feet (I’m not sure that’s the technically-correct term). But no more grody stains or lumps and bumps of paint.
Notice the tag on my lamp. You must think it’s a new lamp. It is not. In fact, it’s probably at least three years old. I have a tag issue at my house. That’s for a later post.
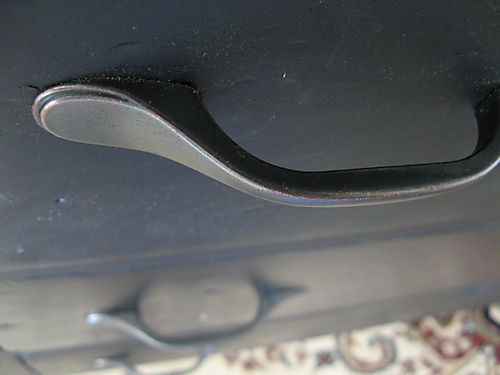
Before Icky Grody Handles:

After Clean, Simple Handles purchased at Target ($16 for 6):
This could have easily been a weekend project. Of course, it wasn’t because I can’t seem to see a project from start to finish without lots of week-long recesses in between. But it’s finally done. And I’m really happy with it.
Some tips:
- I used a paint stripper, but eventually switched to sanding it with a circular sander, which was easier.
- I sanded with three different grits – ending with super fine. Take the time to at least finish off with a super-fine grit. The paint will coat more smoothly and the resulting finish is better.
- Since I didn’t know when it had been painted last, I was concerned about lead paint. I was careful to wear a mask at all times and change completely out of my clothes immediately upon returning indoors.
- I used flat black paint at first, then decided to switch to satin. Don’t try to switch paints without making sure the first layer is completely cured. It was an aweful mess and I had to sand it again before applying a new coat of paint. In fact, just use satin to begin with.
- In order to get a consistent finish, I used several light layers. I swept from side to side past the edges of the piece, so that paint didn’t coagulate at the far left and right.
- Don’t cheap out. Spring for the Krylon at 3 or 4 bucks a can. I’ve used cheap stuff in the past and it doesn’t coat well. I used Krylon this time.
Seriously, depending on your particular aesthetic, you might find your things suddenly seem to make sense if you paint them black. I wish I had before and after pictures of my friend Melissa’s house. A lot of her stuff felt mismatched and dated. In particular, she complained about the 14 year-old brass mirror that was hanging over her mantle. “Paint it black,” I told her. Her eyes lit up. I told her if her stuff seemed dated, it was worth a coat of paint before she went out and bought a bunch of new stuff. She took me VERY seriously. When I arrived at her house a week later, everything but the kids were painted black. The little white baskets on her counter, the ivory lamp and silver mirror in the foyer, the multi-colored frames on her built-ins — she painted a slew of her things black. And her stuff suddenly made sense together. I really, really wish I had before pictures.
I have a couple of other things I’d like to paint black. If the experiment goes well, you’ll see it here. If you don’t see it here, then a) the experiment did NOT go well or b) I am taking forever per usual.
Oh…. I love it! We painted an old kitchen table black and LOVE it.
brittany
oh, i think i found your blog through Andrea.
Oh…. I love it! We painted an old kitchen table black and LOVE it.
brittany
oh, i think i found your blog through Andrea.
Oh…. I love it! We painted an old kitchen table black and LOVE it.
brittany
oh, i think i found your blog through Andrea.